organized homeschool room
Here is the ‘AFTER’ result from the ‘homeschool room organization overhaul time‘ post !
Organizing and de-cluttering truly feels peaceful and wonderful. It’s hard work and takes time but it is beyond worth it to help minds be focused.
STRATEGY:
1. We ended up moving a wall unit that we used to have in our living room (contained our fine china, wine glasses and a ton of other dining stuff) into the school room into the empty hole that the keyboard left. This left all our dining hutch stuff all over the living room with no where to go. :0 So ….. we needed to sacrifice our idea of having a family photo cupboard at the top of the stairs (containing photo books, albums, wedding keepsakes) downstairs to become the new wall unit to hold our dining stuff. We had toooo much stuff, so we had to get tough and PURGE. Eventually, we made the tough decisions and we kept only enough stuff to fit back into the dining hutch. All photo books etc. that were displaced now needed a home. We moved tons of books out of our game room wall unit into BamBam’s closet where other books were living. We still need to purge some books there. At least they are all in one location now. Oh and the 1990s IKEA beech wall unit got moved into our office as hubby needed more tall storage space for his work stuff. A lot of shuffling – but with great thanks, no need for a trip to IKEA to buy something new !!
2. With a third wall unit now in the school room it was time to pull out everything, PURGE MORE, and reorganize into types/topics instead of by grade/age level. Instead of having misc books in the other areas of the home for books – now we’ve merged non-fictional books into the same curriculum shelves by topic too. So a book on say, ‘birds of North America’ would be along side the science curriculum. This is helpful because when we’d be studying a topic I’d think ‘I know we have a book on that somewhere…..’ and not be able to find it.
- Science
- Math
- Writing
- Language Arts
- Spelling
- Fine Motor Skills
- Craft supplies, sewing supplies, sewing machine
- Bible study
- History
- Extra supplies stock
- Equipment
- Memories, archives
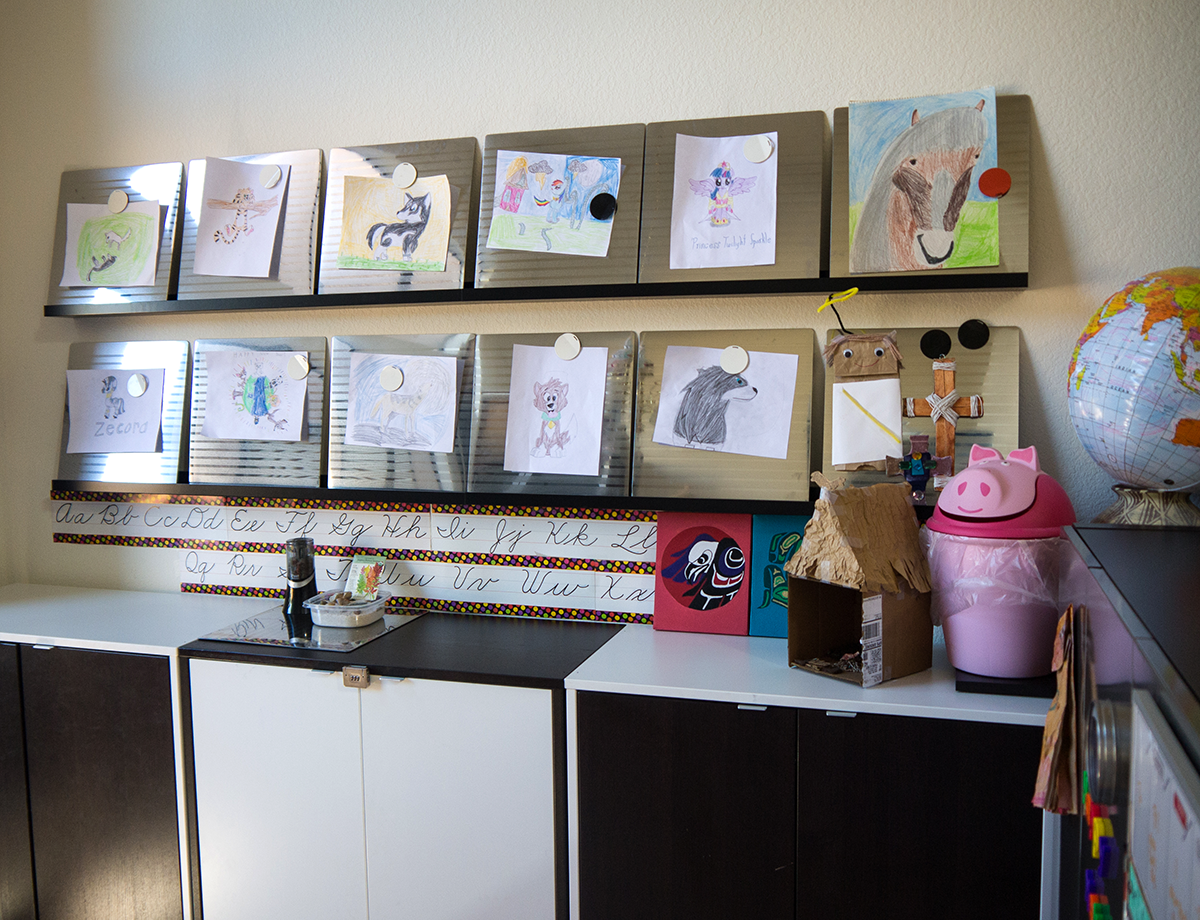
3. The existing sideboard unit was a mess on top and inside. With strong decisions to thin out along with arranging loose papers into boxes, books without the shifty bookends, and better fitting bins for the art materials the inside became more manageable. On top, everything went except the display area, garbage can and my all time favorite tool – the electric pencil sharpener. Kept some drawings and assignments, most our archive method is simply snap good photos of everything for no regrets … and lovingly say goodbye to the recycle bin. Can be tough to do !! The upper art wall display had always been there and we love it, we just need to stay on top of not just piling drawing after drawing on top of each other. So much nicer to view each creation on their own per mat.
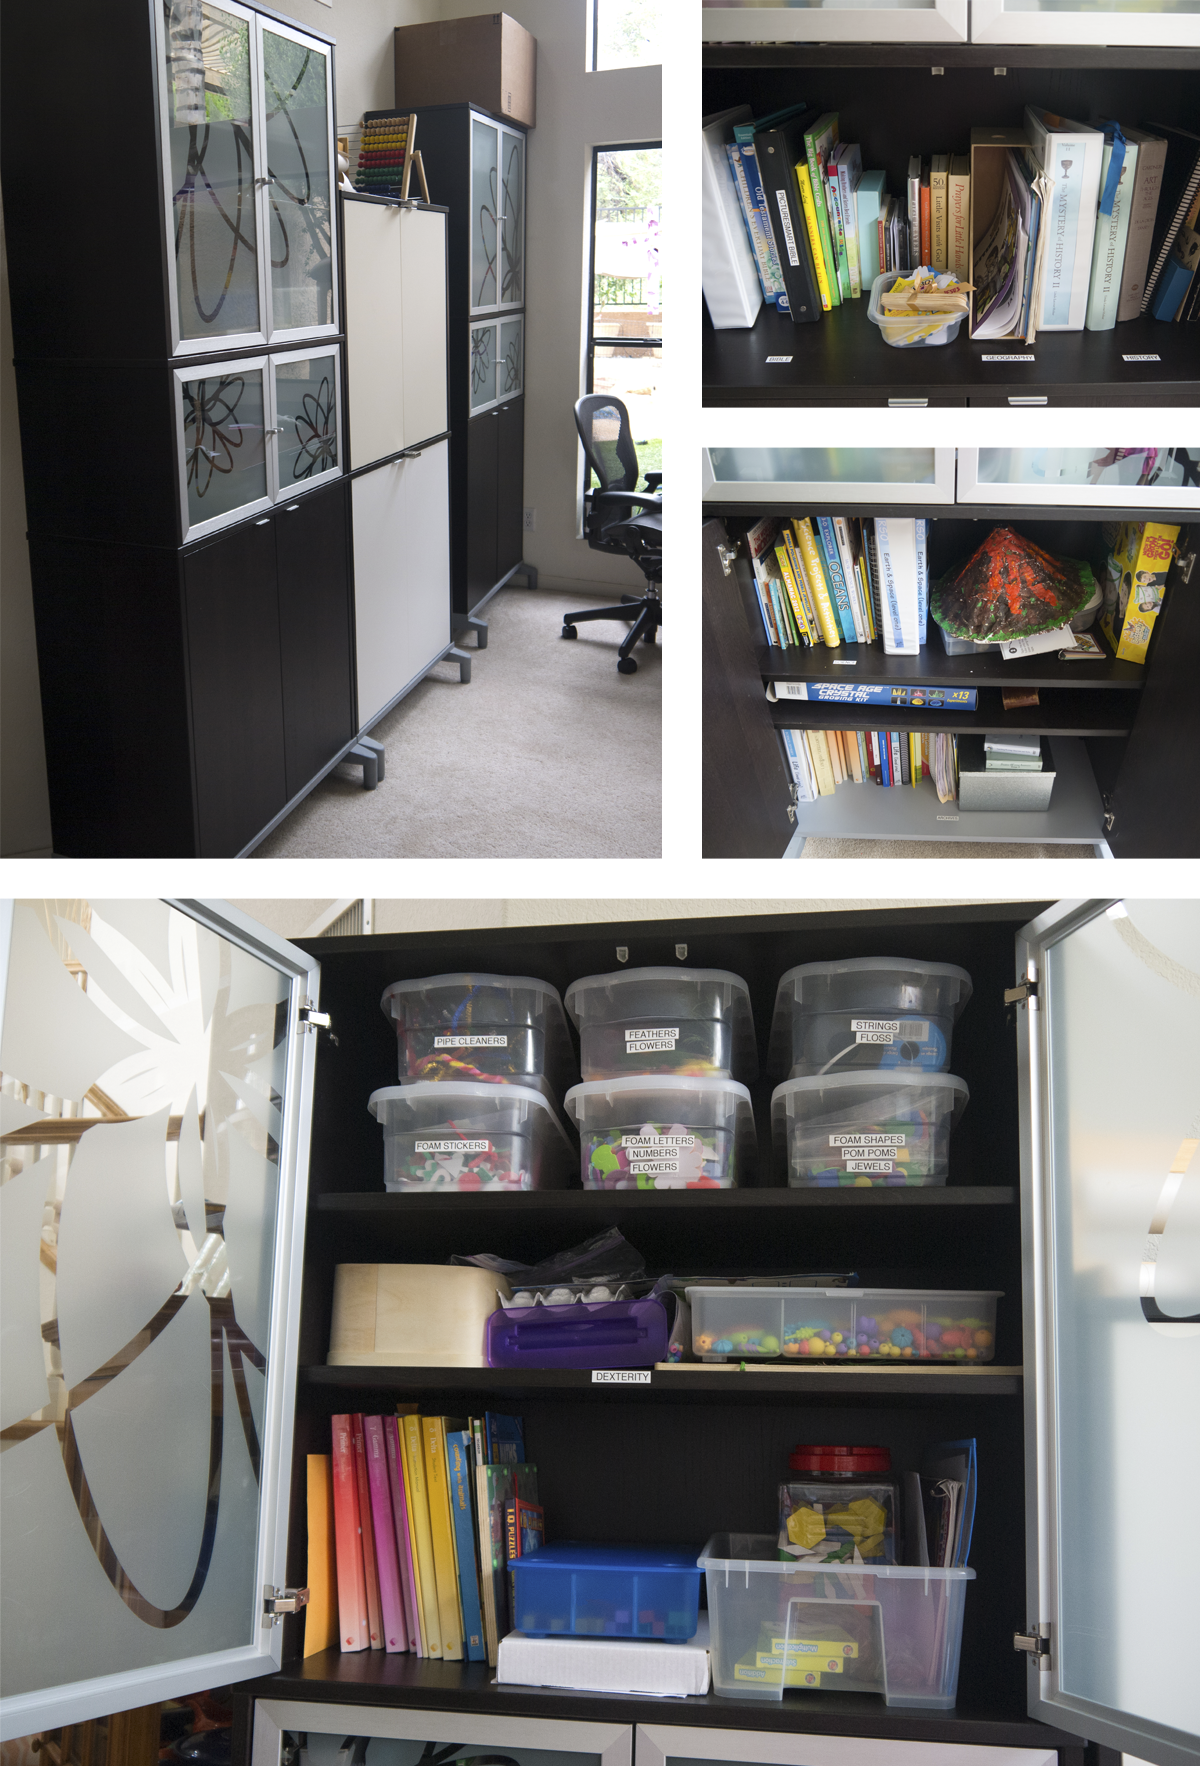
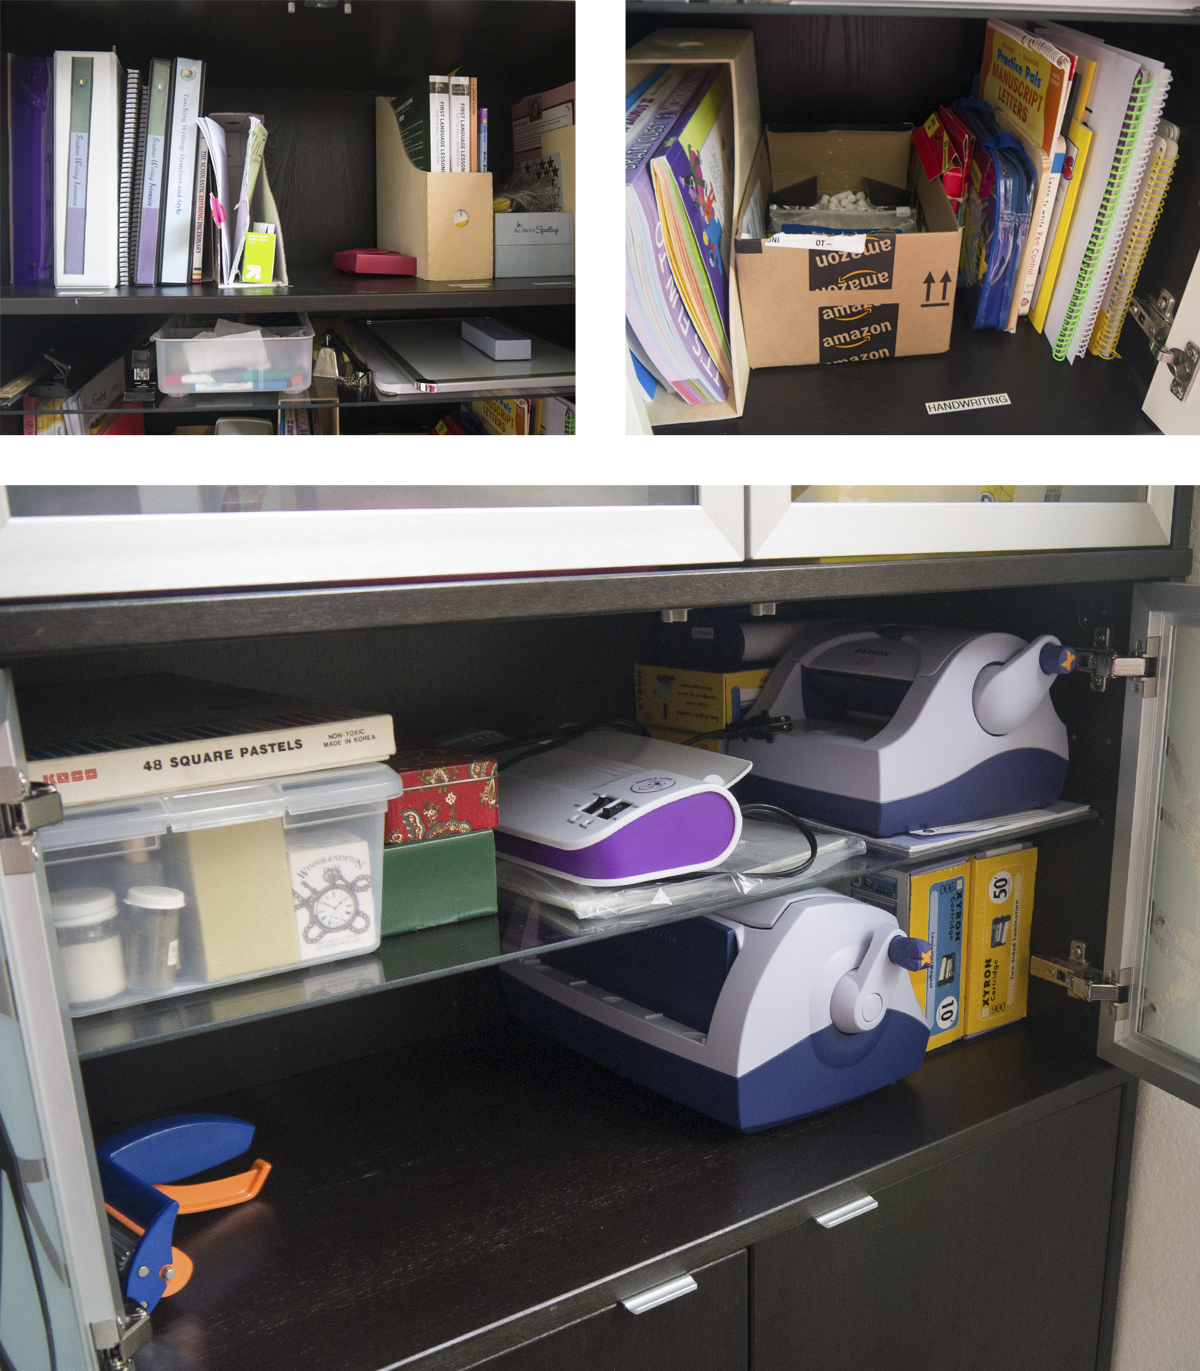
TOP LEFT: the wall now – the box on top isn’t pretty, but it’s there for any ‘chuck in quick’ stuff that might be needed ‘one day’ like all those toilet paper tubes my kids keep picking out of the recycle bin!
TOP RIGHT: Bible & History Shelf. Small items in a container to grab in one shot. On end magazine holder to put thin loose booklets that are awkward.
MIDDLE RIGHT: Science Shelves and below archived curriculum. A whole two shelves for science to fit odd shaped things like the volcano and boxed kits.
BOTTOM RIGHT: The top cupboard contains p-touch labelled craft supplies per bin by type. Second thin shelf for misc. fine motor skill stuff like pop-it-beads, litebrite etc. Below that is a shelf just for math – books, manipulatives, shapes, flashcards etc. in bins to easily grab in one shot.
TOP LEFT: Language Arts – writing and spelling – magazine holders to hold the floppy thin stuff, spelling box cards etc. Underneath is the thin shelf still for everyday common items – but this time a bin holds the smaller items to grab easily and nothing is to be stacked behind the other.
TOP RIGHT: Pre-K misc stuff. The box can be replaced by a nicer looking box later but holds lots of little things like HWT chalk and sponge pieces, chalkboard, magnet writing board etc.
BOTTOM: Craft shelves for awkward larger equipment. Below that that is closed is the large sewing machine and all memories stuff.
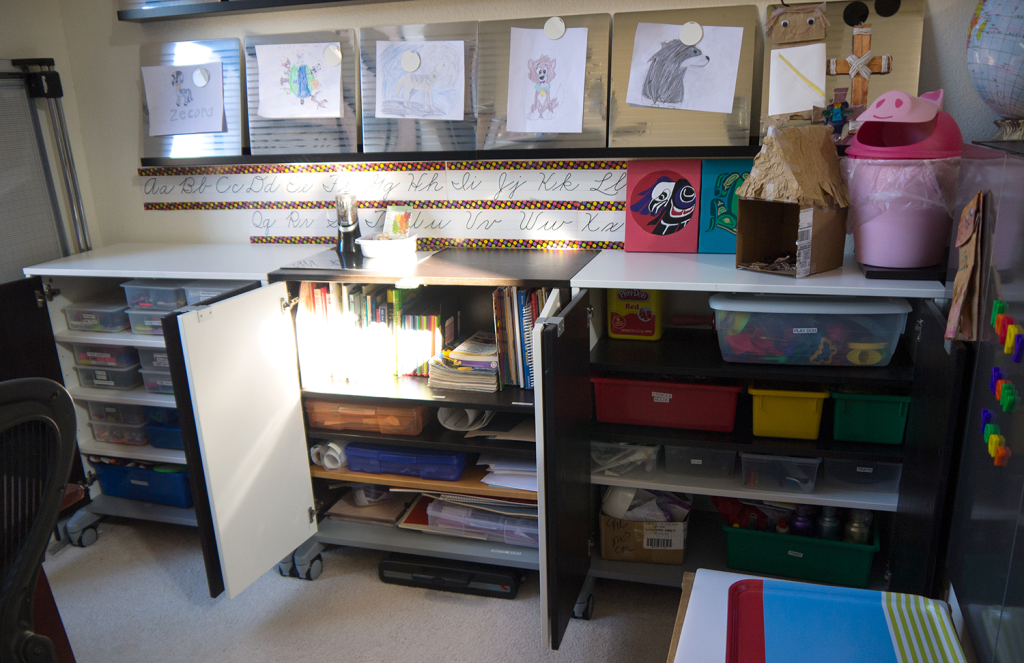
ON WALL: Hubby designed this years ago to hold Pebbles’ copious quantities of artwork – and now BamBam’s too. They are IKEA photo shelves (they have a ‘kick’ that holds things in place) with stainless steel IKEA “Kuvert”place mats which hold art perfectly with magnets.
LEFT cupboard: all supplies are in IKEA bins with p-touch labels
MIDDLE cupboard: Books are re-organized by type (craft how-to, coloring etc.) and pesky bookends are GONE and better larger ones added. Industrial strength & deeper! Thin shelves contain loose papers in boxes instead of vertically like we had them before. Large sketchbooks on own shelf.
RIGHT cupboard: doughs, paints, brushes, polymers etc in bins and labelled. No boxes on top of each other anymore to pull out.
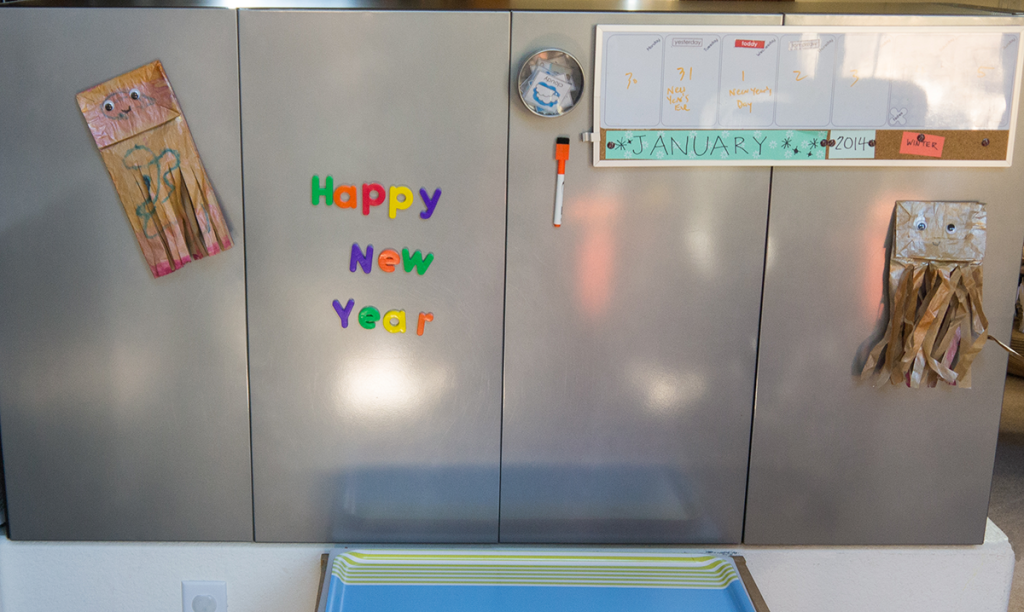
Hubby created this wall for us a few years ago. It’s the backside of an IKEA wall unit but it’s covered up with the IKEA “Spontan” large metal magnet board panels – just so happened to fit utterly perfectly.
We needed some vertical space to be able to post stuff up like alphabet letter play, photos, our date calendar weather station etc. This is my personal favorite item in the whole room I think. For different holidays or seasons we put on top fun Christmas, Halloween, or Easter decorations and stuff. 🙂 Is also a room divider between the homeschool room and game TV room. Let’s be honest… reality comes back into play and we don’t always want to see this room 24/7 !! It will become messy again – but messiness is learning and being creative so that’s fine. We just need to re-assess and purge a couple times a year to maintain the joy and focus in this room.



0 Comments
Trackbacks/Pingbacks